
Unlock your iPhone’s full potential. Learn how to use Portrait, Pano, Spatial, and Photo modes to capture professional-quality images in any setting.
Master iPhone Photography
- Mobile photographers often underutilize the full capability of Apple’s hardware by relying solely on the default shooting setting, according to photography experts. While the standard Photo mode handles general tasks, mastering specialized functions—such as Portrait, Panorama, and the newer Spatial mode—can transform everyday snapshots into professional-grade imagery.
Understanding the distinct mechanics of each shooting option allows users to select the ideal tool for specific lighting and composition scenarios.

Portrait Mode: Simulating Professional Depth
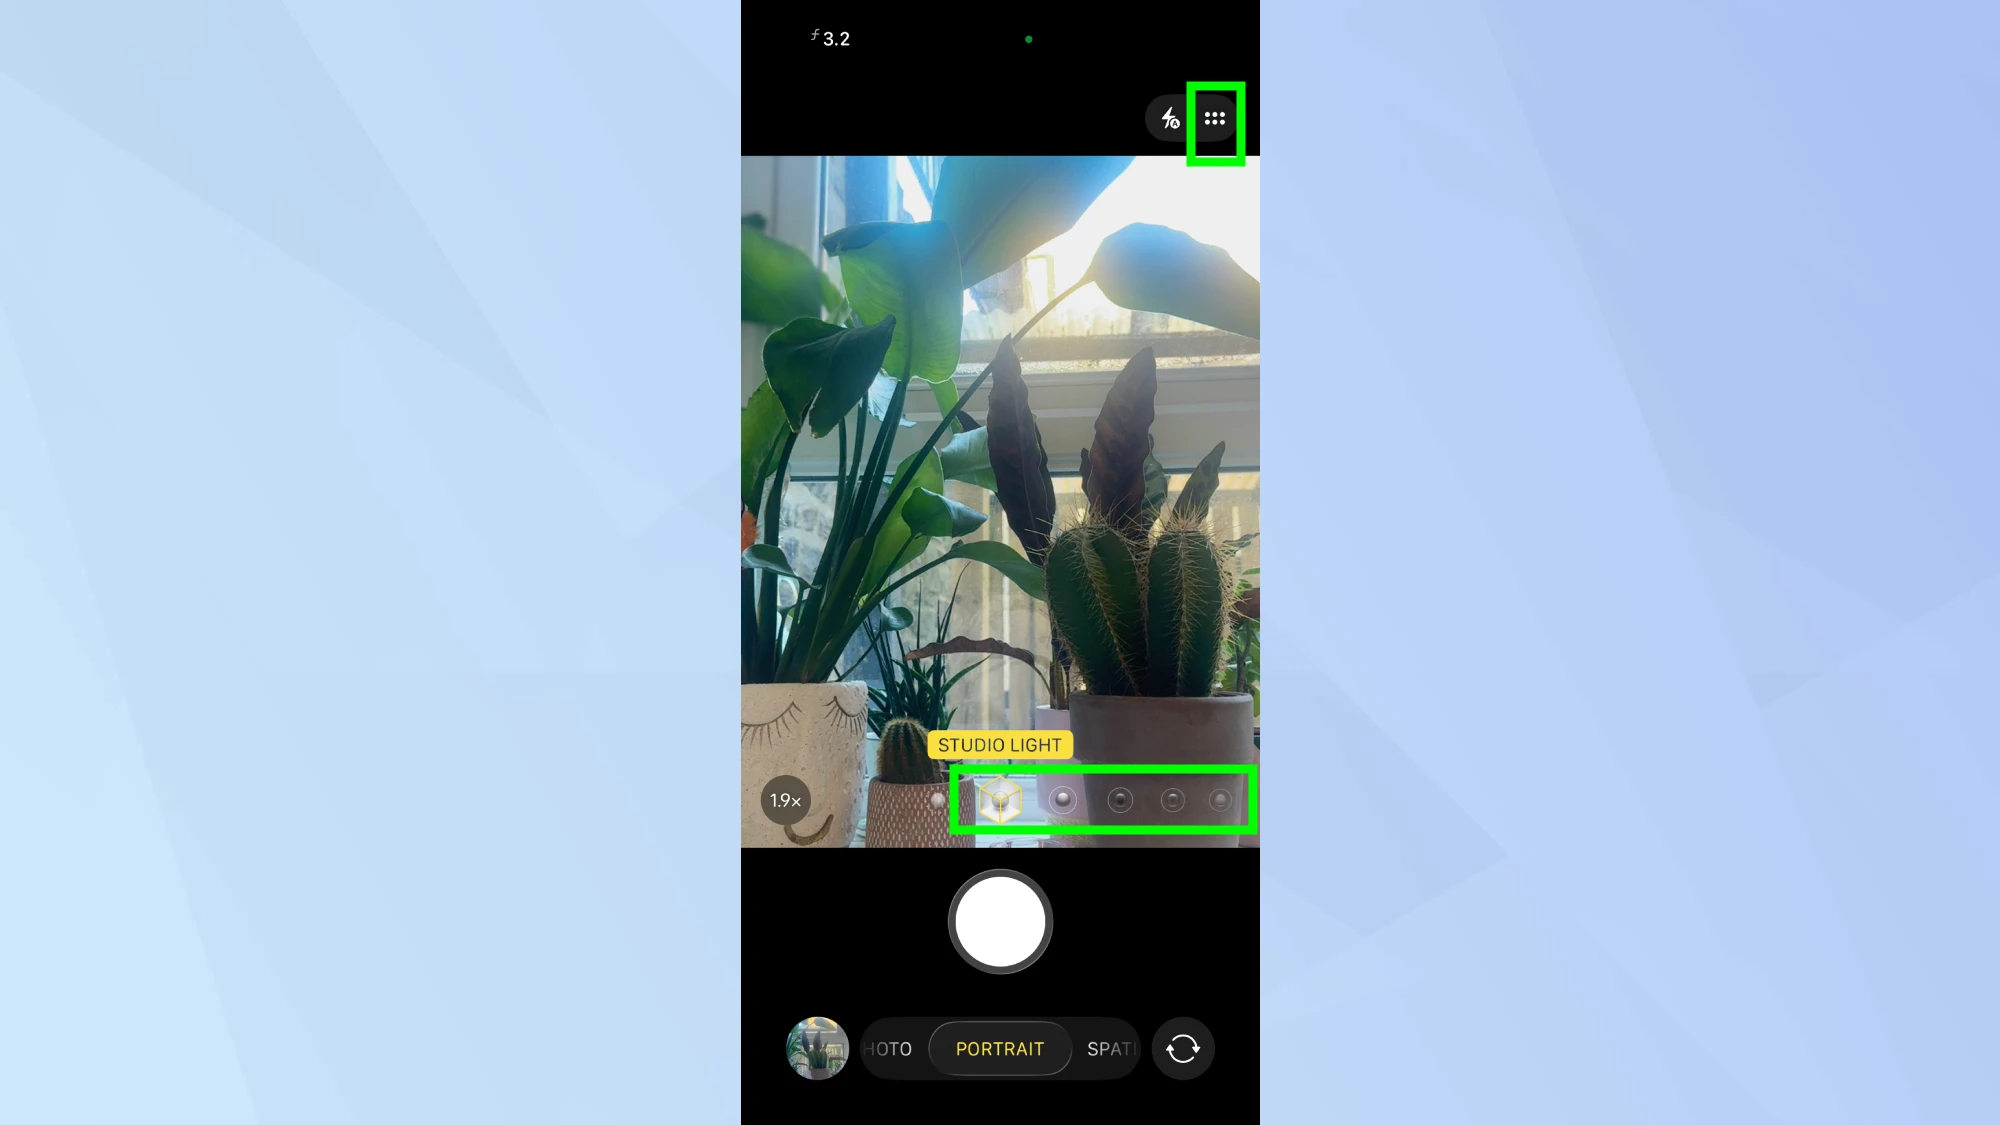
Portrait mode distinguishes itself by creating a “bokeh” effect, which keeps the subject sharp while artistically blurring the background. This feature mimics the shallow depth-of-field typically produced by DSLR cameras equipped with fast lenses.
The software requires a specific distance from the subject to function correctly. The camera interface alerts users to move closer or farther away to achieve the optimal focal range. Once active, the background blur renders automatically.
Users can further refine these images using on-screen tools. The “f” icon allows photographers to adjust the depth control, sliding left for subtle blur or right for a stronger effect. Additionally, the mode offers lighting presets, such as Contour Light for dramatic shading or High-Key Light Mono for a studio-style black-and-white aesthetic. These edits remain adjustable in the Photos app even after the image is captured.
Pano Mode: Capturing Wide and Tall Perspectives
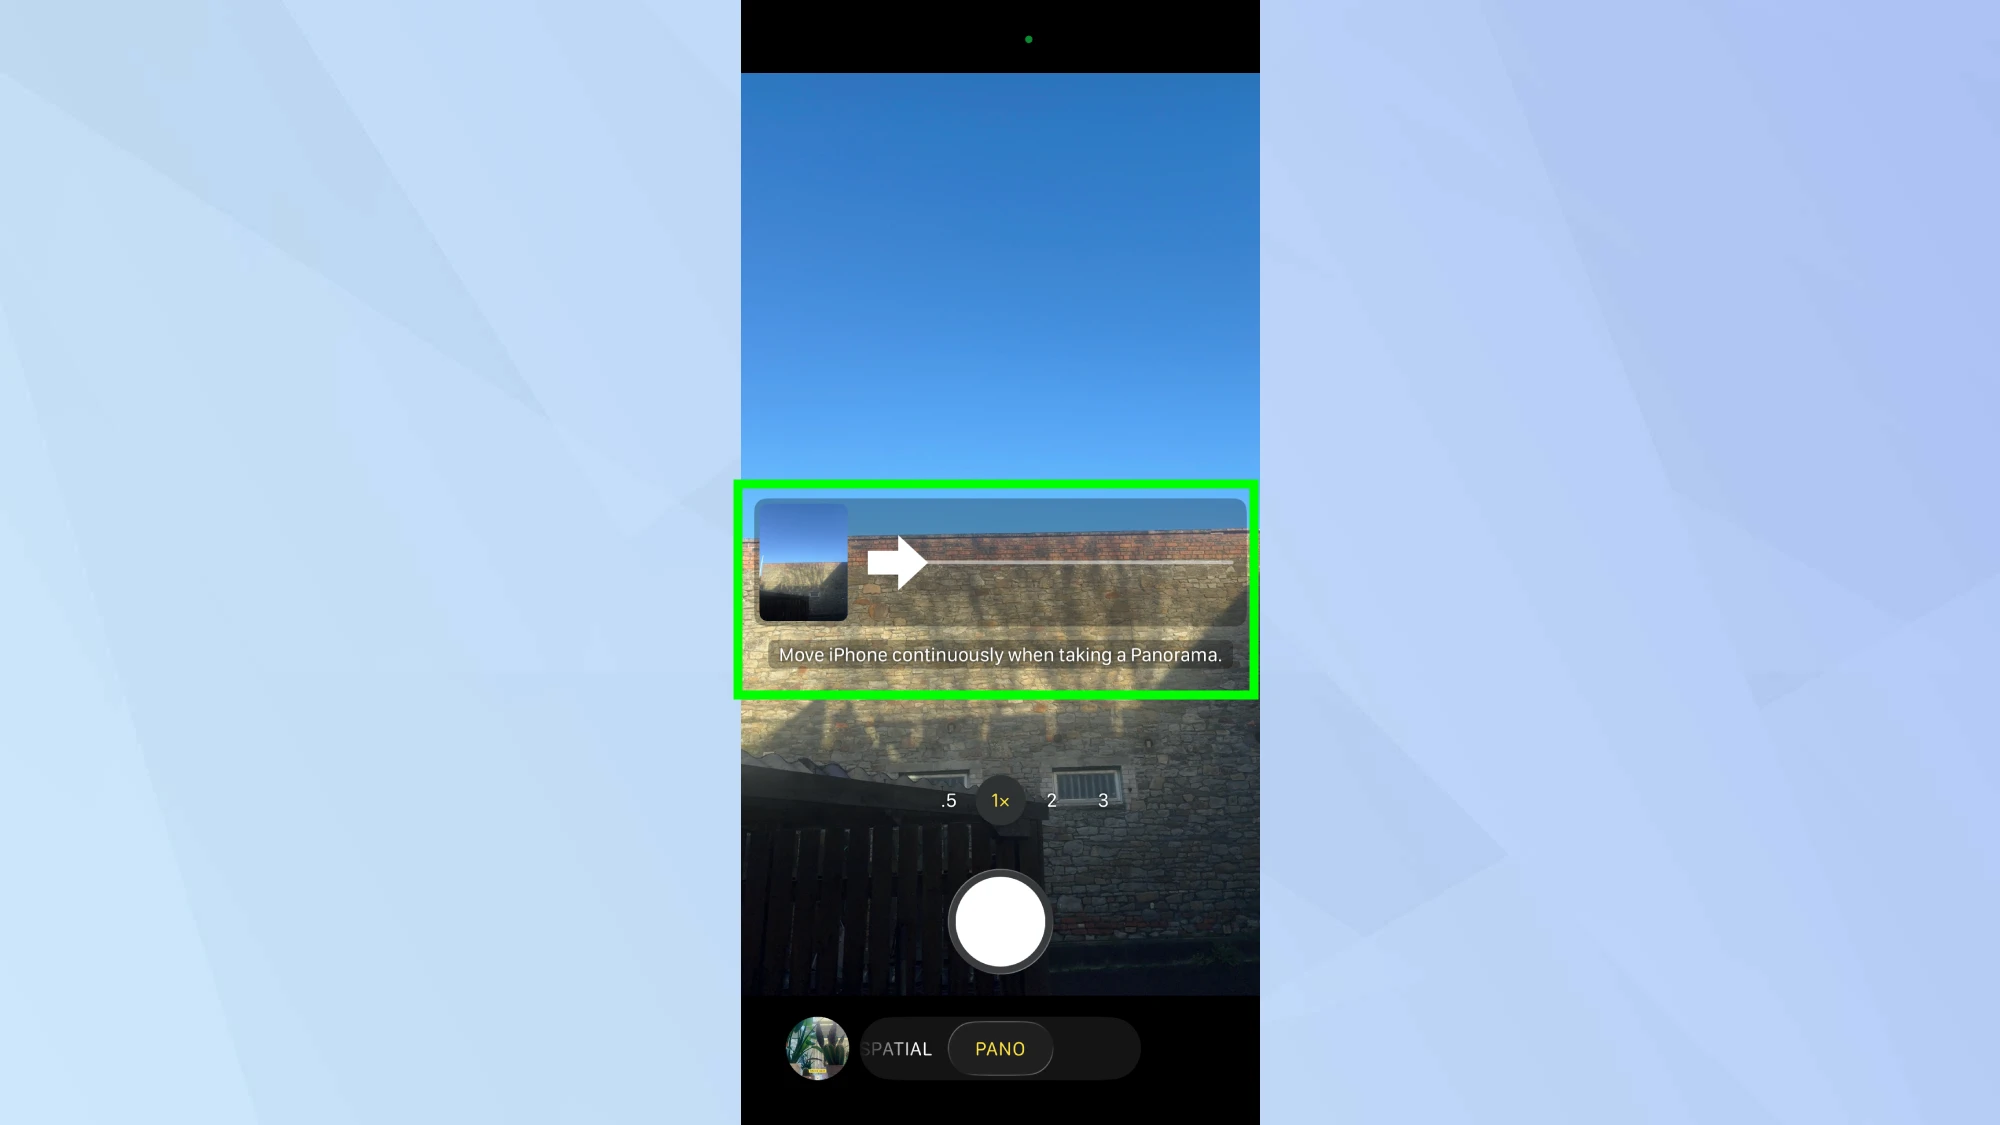
Panorama, or Pano mode, addresses the limitations of standard lenses when photographing expansive scenes. This function stitches multiple continuous frames into a single high-resolution image, making it ideal for city skylines or vast landscapes.
The interface displays a guide arrow centered on a horizontal line. Photographers must press the shutter and pan the device slowly and steadily in the direction indicated. Sudden movements can cause alignment errors or visible seams in the final photograph.
While typically used horizontally, this mode also supports vertical capture. By rotating the iPhone to a landscape orientation and panning upward, users can photograph tall structures, such as skyscrapers or redwoods, without switching to an ultra-wide lens.
Photo Mode: Unlocking Hidden Manual Controls
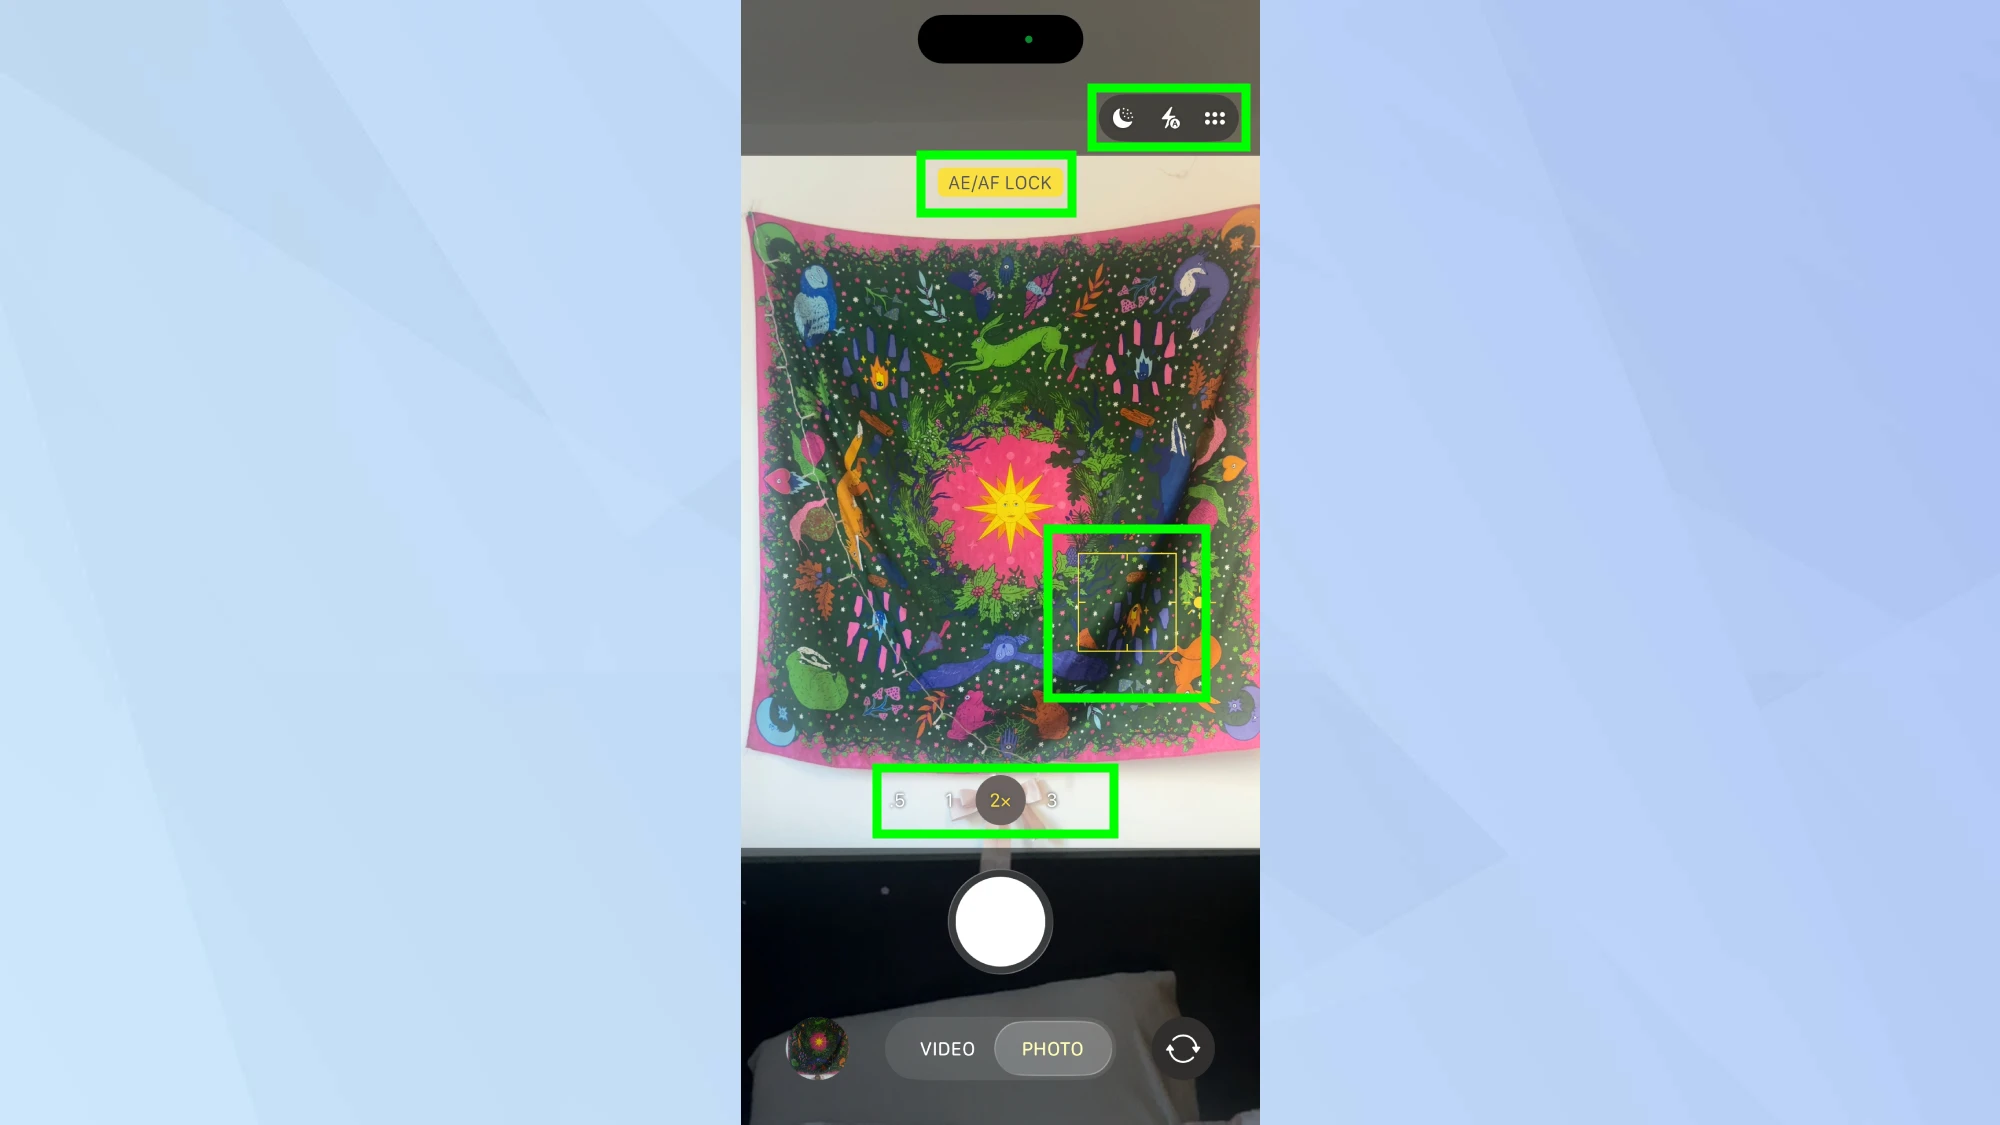
The default Photo mode contains more advanced functionality than its simple interface suggests. While the iPhone automates focus and exposure, users can override these settings for creative control.
Tapping the screen sets a specific focus point. Holding that tap engages the AF/AE Lock, which fixes the focus and exposure values even if the camera moves. Users can also manually brighten or darken an image by sliding a finger up or down next to the focus box.
A hidden menu, accessible by tapping the arrow icon at the top of the screen, reveals further options. These include timer settings, aspect ratio changes, and photographic styles. Furthermore, the camera software automatically engages Macro mode for close-ups or Night mode for low-light environments when it detects the necessary conditions.
Spatial Mode: Future-Proofing for Virtual Reality
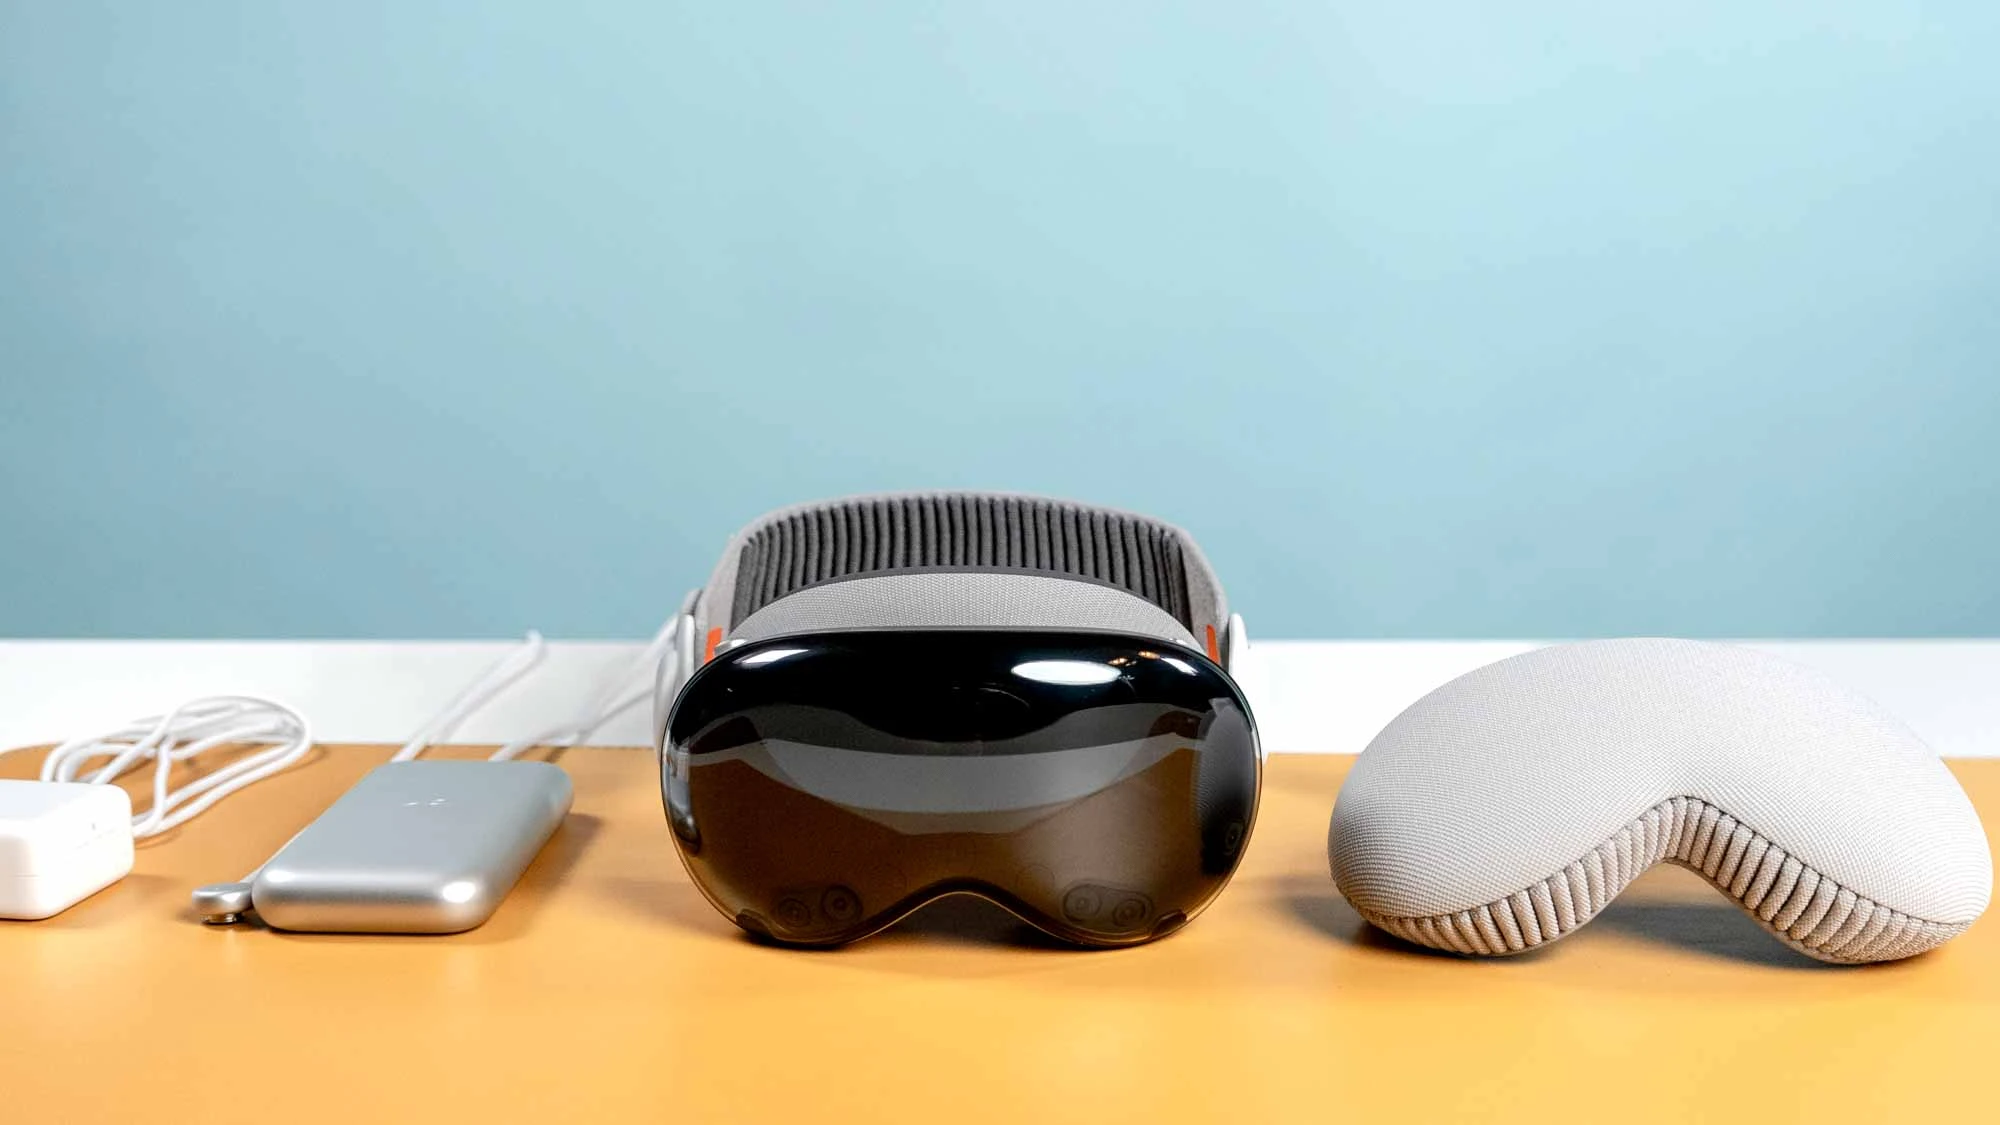
Spatial mode represents the most specialized tool in the iPhone’s suite, designed exclusively for the Apple ecosystem’s 3D capabilities. Available on iPhone 15 Pro models and the iPhone 16 series, this feature captures depth information alongside video and still images.
The content created in this mode appears as standard 2D media on phones or computers. The three-dimensional effect is only visible when viewed through an Apple Vision Pro headset. For optimal results, Apple recommends holding the device horizontally steady and keeping subjects between three and eight feet away.